The learning goals for this assignment are:
Second, my recommendation is to not use full-size digital images when testing your application. Images take a lot of memory, and without additional configuration settings when you run Java, your Java Virtual Machine may run out of memory. So, to make your life easier, you may want to scale down your photos to 640x480 or some such, and not use too many of them.
(A "real" photo browser application (on any platform, not just Java) would handle this by not loading up all images at once, but only lazily loading them when needed, and unloading them when they're not actually being displayed.)
Finally, a good strategy for an assignment like this is to start small. For example, implement one of the view modes and get it working before worrying about changing between views. For the thumbnails, you might start by creating "dummy" thumbnail components that don't actually render real photos, but simply show a 75x50 block of red or some such. This will let you start working on application integration without having to have everything working completely beforehand.
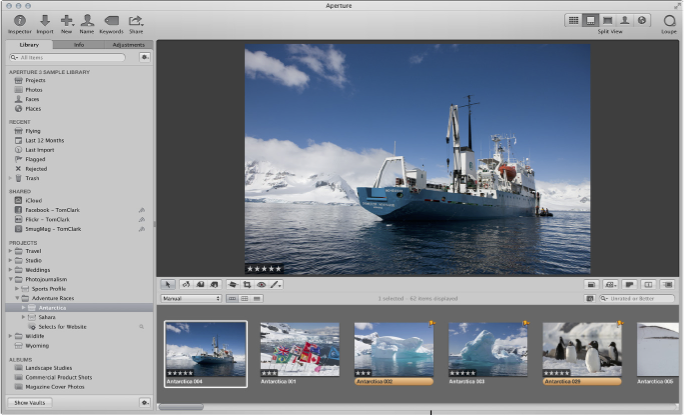
Additionally, the user should be able to single-click on a thumbnail image in either the Split View or Browser mode to change the currently selected photo (in Split View this will display a new photo at the top of the Light Table and change the highlighted thumbnail; in Browser mode this will just change the highlighted thumbnail).
In either Split View or Browser View, double clicking on a thumbnail should select that photo, and switch your viewing mode to Photo View.
Finally, in any view, selecting Delete Photo from the menu should remove the current photo and thumbnail, and navigate the user to either the next or previous photo in the list. This menu item should be greyed out if there are no photos imported, or no current photo is selected.
Be sure that your View menu works correctly: selecting one of the modes from this menu should change the corresponding view mode, and likewise when you double click to enter Photo View mode, the menu should reflect this change in state. The "flipping" and drawing behavior from the previous assignment should continue to work on the PhotoComponents displayed in Photo or Split view mode.
To summarize, the specific navigation-related functions you need to implement are:
Hint: Scaling is easy. In your paintComponent() implementation, just make a copy of the Graphics object that's passed to you, cast it to a Graphics2D object (the one that has all the fancy operations on it), and then call scale() on it, passing a floating point scaling factor (0.2 to draw at 20% normal size, for example).
(There are other approaches you could use to create a ThumbnailComponent, but this is the one that seems the most straightforward to me.)
When your application starts it should "tell" your LightTable about the set of photos that have been imported; the LightTable can then create PhotoComponents and ThumbnailComponents to represent these, store them in some data structure, and install them in the various panels that you use for layout, depending on what your mode is.
Hint: Remember that Swing components can only have one parent at a time. So whenever your viewing mode changes you'll need to take the components out of the panel that currently contains them and add them to the panel you're using for your current layout mode. For example, if you've got a bunch of thumbnails installed in the 1-d filmstrip panel, and you change to Browser mode, you'll want to remove these and re-add them to the panel that implements the 2-d browser layout. You'll probably want to write a little changeMode() helper function to do this work for you.
For the panels that contain Thumbnails, you'll probably want to use either BoxLayout or FlowLayout for the Split view panel, and GridLayout for the Browser view panel. Check the Java Docs for each of these; you'll probably want to add some padding (called "glue" in the BoxLayout) around your Thumbnails so that they look nice.
Note: By using the existing Swing Layout Managers to arrange the thumbnails and photos, you're ensuring that the panels that contain them will be sized correctly: the layout manager you select will figure out the size necessary to hold the children components (by querying them for their min, max, and preferred size), position them correctly, and then set the size of the panel so that it can hold them all. In order for this to work, you need to make sure that your Thumbnail and Photo Components are returning correct values for min, max, and preferred size.
How do you implement scrolling of the browser or split view panels? Easy! Rather than adding these panels directly to the LightTable, add them to a JScrollView and then add that to the LightTable. The JScrollView will let its child component expand to whatever size it needs, and then add a scrollbar so that you can move around the view to see all of it.
When you know what thumbnail has been clicked, you can then set it as selected and/or change the currently displayed photo. An easy way to highlight the selected thumbnail would be to call setBorder() on it to give it a visible border.
Overall hint for this assignment: Having repaint problems? Are your changes not getting reflected on screen? Be sure to call revalidate() anytime the set of children changes, or your size changes. Be sure that your components are responding with valid min/max/preferred sizes when queried.Possible gotcha: Having event problems? Are your components not responding properly to mouse events? Remember that Swing dispatches events to the lowest leaf-node component that can accept those events. So, if you've made your ThumbnailComponent a MouseListener, it'll receive the events rather than the panel that contains it. So be sure to not make your thumbnail component a MouseListener if you don't want this to happen.
One possibility is to do variable-sized thumbnails. One way you could do this is to have a "zoom slider" at the bottom of your Light Table. Moving the slider changes the scale factor--meaning you'd iterate through all of the thumbnails and update the scale factor that they use to paint and to compute their sizes. Remember that the thumbnails should "notice" when their scale factor is updated and then call repaint() on themselves and generate a component event when their size changes. +4 points for doing this one.
A more complicated feature is to allow the user to drag thumbnails in either the split or the browser view to change their order. If you do this, you will need to change the way the thumbnails are contained in their parents: in particular, you will not be able to use the standard LayoutManagers to lay out the thumbnails, since these layout managers expect to be able to control the positions of their children, and wouldn't allow a drag. Instead, you'd need to set the positions of the thumbnails within their parent explicitly (probably by doing this "manually" although you could create a custom LayoutManager class if you really wanted to get fancy).
For the drag, when the mouse is pressed anywhere in the parent component you should record the thumbnail (if any) on which the press occurs. Then, when a mouse drag begins, you can begin moving the selected component. Do this by calling setBounds() on the thumbnail. Note that to do this "right" you'll have to set the new location of the thumbnail to be the location of the mouse pointer minus the offset of where the mouse press occurred inside the thumbnail.
When the drag ends (and the mouseReleased callback is fired), you should iterate through the list of thumbnails to figure out where the dragged thumbnail was dropped. Then you can (1) reorder the photos in the application to reflect the new ordering, and (2) recompute new standard positions for all of the thumbnails in the LightTable (so that everything appears aligned on a grid for example). Up to +8 points for this feature.
As described above, when a drag ends the thumbnails will all have new positions and will be repainted. Visually, this will look like the thumbnails instantly snapping into their new locations. We know that jarring visual transitions are bad (right??), and so a nicer effect would be to smoothly move the thumbnails to their new positions. This actually isn't as hard as it sounds: look at the current position and the intended final position for each thumbnail. Compute a set of intermediate points (maybe 10 or 20) between these, for each thumbnail, and save these in a list. Now you're all set! Use the Swing Timer class (javax.swing.Timer) to schedule a series of events; for each event, set the location of each thumbnail to the successive item in its intermediate position list. By changing the position of the components, Swing should repaint the window and show each component smoothly moving to its new position on the screen. +4 points for this one.
As usual, if you do something else that's above and beyond the call of duty, let us know in your README file and we may assign some extra credit for it.
See here for instructions on how to submit your homework. These instructions will be the same for each assignment.